
Sauces & Condiments
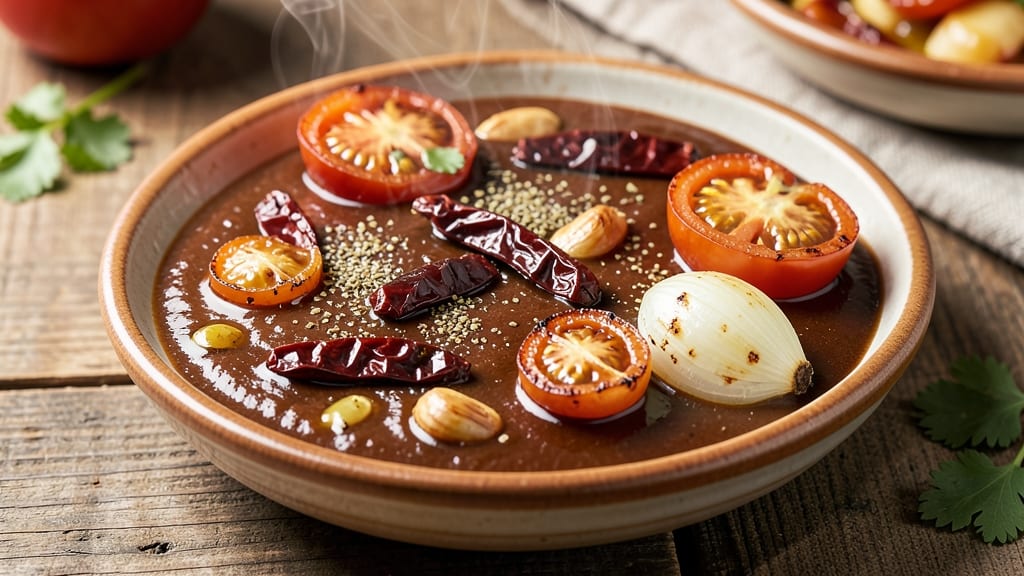
This ancho chile enchilada sauce transforms ordinary enchiladas into a restaurant-worthy masterpiece with its smoky, earthy depth and perfect balance of heat and richness. 🌟 The secret lies in dried ancho chiles—roasted until fragrant, then blended with tomatoes, garlic, and a touch of vinegar to create a velvety sauce that clings beautifully to tortillas.
What sets this apart is the optional celery crown crunch contrast, adding a refreshing textural element that cuts through the richness when served.
The foundation of this sauce begins with rehydrating ancho chiles in hot broth, allowing their natural sweetness and smokiness to infuse the liquid completely. As the sauce simmers, it develops a smooth, velvety consistency that coats every bite without overpowering the dish.
The key spices—cumin, oregano, and a pinch of cinnamon—layer complexity without dominating, creating a sauce that works equally well for enchiladas, tacos, or as a dipping sauce for grilled meats.
What makes this sauce especially impressive is its versatility and longevity—it tastes even better the next day as flavors meld and deepen. Whether you're preparing for a family gathering or meal prepping for the week, this sauce delivers restaurant-quality results with minimal effort.
The optional celery crown crunch adds a bright, crisp contrast that elevates every spoonful, making it a standout element in any Mexican-inspired meal.
Perfect for enchiladas, tacos, or as a dipping sauce, this ancho chile enchilada sauce is designed to be foolproof and adaptable. The instructions walk you through every step—from rehydrating the chiles to achieving that ideal silky texture—so you can focus on enjoying the final product.
Let’s get started on creating a sauce that will become your new go-to for any Mexican feast.
Ingredients for ancho chile enchilada sauce
Smoky, velvety, and packed with restaurant-quality depth—these ingredients transform simple enchiladas into a showstopper.
| Ingredient | Amount | Notes |
|---|---|---|
| Dried Ancho Chiles 🌶️ | 4 whole | Stemmed, seeded, roasted until fragrant |
| Medium Tomatoes 🍅 | 2 whole | Roma or vine-ripened, cored, chopped |
| Garlic Cloves 🧄 | 4 cloves | Peeled, lightly toasted for depth |
| White Onion 🧅 | ½ whole | Peeled, quartered, charred slightly |
| Ground Cumin 🌿 | 1 tbsp | Toasted for enhanced aroma |
| Dried Oregano 🍃 | 1 tsp | Mexican oregano preferred |
| Ground Cinnamon 🌶️ | ¼ tsp | Lightly toasted for warmth |
| Apple Cider Vinegar 🍏 | 1 tbsp | For brightness and balance |
| Vegetable Broth 💧 | 1 ½ cups | Low-sodium for flavor control |
| Extra-Virgin Olive Oil 🫒 | 2 tbsp | For roasting chiles and richness |
| Salt 🧂 | 1 tsp | Kosher or sea salt preferred |
| Celery Stalks 🥬 | 2 whole | For optional crunch crown (chopped fine) |
| Lime Juice 🍋 | 1 tbsp | Freshly squeezed for final brightness |
Ancho chiles are the heart of this sauce, so pick the plumpest, darkest ones—they’re sweeter and less bitter. La Tienda or Mexican markets usually carry the best selection, but any grocery store’s international aisle works. Toast them in a dry skillet over medium heat until fragrant (about 1 minute per side), then soak in hot broth to soften. The tomatoes should be vine-ripened—Heirloom or Roma from the farmers market have the best flavor. For the onion, charring adds a smoky depth that mimics traditional Mexican cooking techniques. If you can’t find Mexican oregano, regular dried oregano works, but Penzeys or Gourmet Spice Shop carry authentic varieties if you’re willing to splurge.
No ancho chiles? Pasilla or guajillo chiles work in a pinch—just adjust the quantity to match heat preference. Fresh tomatoes when it’s not peak season? Canned San Marzano tomatoes (drained well) are a game-changer—they’re sweeter and more consistent. The celery crown is optional but worth it for that crisp contrast; if you skip it, add an extra 1 tbsp lime juice for brightness. For a smokier flavor without chiles, 1 tsp liquid smoke (like La Choya) can be added at the end. The cumin and cinnamon should be toasted in a dry pan for 30 seconds before adding to deepen their flavors—don’t skip this step.
This sauce gets better with time—taste and adjust seasoning after 30 minutes, then let it sit overnight for maximum flavor development. Store in an airtight container in the fridge for up to 5 days, or freeze for 3 months. For the celery crown, keep it separate until serving to maintain crispness. If making ahead, freeze the sauce without the celery, then add it fresh when ready to serve. The sauce thickens as it cools, so add a splash of broth or water if it’s too stiff when reheating.
Why You'll Love This Recipe
- No-Chop Nightmare: I swear by this sauce because it’s the only enchilada sauce I make when I’m too tired to chop anything. Soak those ancho chiles in hot water for 10 minutes—that’s it—and they soften right up. No knife skills required, just a quick tear and a blender. Honestly, my lazy nights thank me every time.
- Smoky Depth Magic: The moment you blend those rehydrated ancho chiles with garlic and cumin? Chef’s kiss. That smoky, slightly sweet heat lingers like a hug from your abuela’s kitchen. The tomatoes add brightness, but it’s the cumin that makes it sing—earthy, warm, and impossible to resist. (Yes, even on a Tuesday night.)
- Meal Prep MVP: This sauce doubles perfectly and keeps for a week in the fridge, making it my go-to for batch cooking. Slather it on enchiladas, drizzle over grilled chicken, or toss with rice—it’s the secret weapon in my freezer. My daughter picks out the leftovers first, and she’s not even a spice lover.
- Pantry Stash Hero: Between us, dried ancho chiles are the most underrated pantry item. A handful costs pennies but transforms into a sauce that feels fancy. No fresh ingredients needed beyond onion and garlic, which I always have on hand. Budget-friendly? Absolutely. But the flavor? Ridiculously good.
Step-by-step instructions for ancho chile enchilada sauce
Here's how to build smoky, complex flavor with perfect texture—every step matters.
🔥 Step 1: Char and Toast the Base Ingredients
Heat a dry skillet over medium-high heat. Add the 4 whole dried ancho chiles and toast them for 30-45 seconds per side until fragrant and slightly puffed. Watch closely—they'll darken quickly. Immediately transfer to a bowl and cover with 1.5 cups vegetable broth to soften while you work.
In the same skillet, add the 2 whole medium tomatoes and char them for 5-6 minutes until blackened in spots. Remove and chop roughly. Then add the 0.5 whole white onion, quartered, and char for 3-4 minutes until caramelized. The deep color from charring develops the sauce's signature depth.
🍳 Step 2: Build the Flavor Foundation
To the skillet, add 2 tablespoons extra-virgin olive oil and heat over medium heat. Add the 4 peeled garlic cloves and toast for 30 seconds until golden and fragrant. Immediately add 1 tablespoon ground cumin, 1 teaspoon dried oregano, and ¼ teaspoon ground cinnamon, stirring constantly for 1 minute to toast the spices.
Here's the thing—don't let the spices burn. They should smell warm and earthy, not bitter. If they darken too quickly, reduce heat to low and stir more gently. This step unlocks the sauce's complex aroma profile.
🥘 Step 3: Simmer and Reduce the Sauce
Pour the softened chiles (with their soaking liquid) into the skillet with the spices. Add the charred tomatoes and onion, then stir in 1 tablespoon apple cider vinegar and 1 teaspoon salt. Bring to a gentle simmer, then reduce heat to low and cook uncovered for 15-20 minutes, stirring occasionally, until thickened to a glossy consistency.
You'll know it's ready when the sauce coats the back of a spoon and has reduced by about ⅓. The color should be deep red with visible flecks of charred onion and tomato. If it's too thick, add 2-3 tablespoons water to reach your desired consistency.
👨🍳 Step 4: Finish with Celery Crown and Brightness
While the sauce simmers, finely chop the 2 whole celery stalks (this is your crunch crown). When the sauce is ready, remove from heat and stir in the chopped celery and 1 tablespoon lime juice. The celery adds a refreshing crunch contrast that balances the rich sauce.
Taste and adjust seasoning—you might need a pinch more salt or lime to brighten. Real talk: the sauce will thicken more as it cools, so don't over-reduce it now. For best results, use the sauce immediately on enchiladas or freeze for up to 3 months.
Pro Tips For Making Ancho Chile Enchilada Sauce
- SOAK CHILES LONG ENOUGH: I learned this the hard way—skipping the 20-minute soak in warm water just to save time leaves your chiles tough as leather. They need to plump up fully before seeding and skinning, or you’ll end up with a sauce that’s more grit than flavor.
- ROAST TOMATOES UNTIL BLACKENED: Those charred spots on your tomatoes aren’t just for show—they’re where the deep, smoky sweetness hides. Roast them skin-side down until blackened in spots, then peel them while warm. (Yes, even if you’re impatient like me.)
- SWEAT ONIONS LOW AND SLOW: Crowding the pan or cranking the heat turns your onions into sad, watery mush. Keep it on medium-low, stirring often, until they’re translucent and just starting to caramelize—about 8-10 minutes. This is the thing that matters most for flavor.
- TOAST CUMIN UNTIL FRAGRANT: Dump that ground cumin straight in? Skip it. Toast it in the dry pan for 30 seconds until it smells like a Mexican bakery, then add the onions. Sounds weird, but it works—your sauce will taste richer and more complex. (Your future self will thank you.)
Pro cooking tips for great ancho chile enchilada sauce
Toast Spices Properly
Toast your spices—cumin, oregano, and cinnamon—directly in the skillet over medium heat for 30-45 seconds until fragrant. This step unlocks their full flavor potential and prevents bitterness.
I use a 10-inch cast iron skillet for even heat distribution. Stir constantly to avoid burning, which can make the sauce taste harsh. 🌿
Control Char Depth
When charring tomatoes and onions, aim for 50% blackened with 50% still vibrant. Over-charring turns the sauce bitter, while under-charring leaves it flat. I rotate the pan occasionally for even browning. Use a tongs to flip onions for consistent caramelization.
Simmer Gently
Keep the sauce at a gentle simmer—small bubbles at the edges—to develop depth without burning. If it boils vigorously, reduce heat immediately. I find low heat on a gas stove or 2 out of 10 on electric works best. Stir every 3-4 minutes to prevent sticking.
Adjust Consistency
The sauce should coat the back of a spoon but remain pourable. If too thick, add 1 tbsp broth at a time until silky. If too thin, simmer uncovered for 5-10 extra minutes.
I test consistency by dipping a clean spoon and watching how it drips—it should leave a glossy trail, not pool.
Celery Timing
Add chopped celery only at the very end—its moisture can thin the sauce. For extra crunch, pulse it in a food processor for 2-3 seconds before stirring in.
If using, reserve 1 tbsp lime juice for final brightness, as it can break down the celery's texture if added too early. 🥬
Storage Secrets
Cool sauce completely before refrigerating to prevent bacterial growth. Store in glass airtight containers for up to 5 days. For freezing, use silicone ice cube trays for single-serving portions. Thaw overnight in the fridge—never microwave directly from frozen, as it can make the sauce grainy.
Nutrition facts
Frequently asked questions
Can I substitute ancho chiles with other dried chiles?
Yes, but adjust for heat and flavor. Pasilla or guajillo chiles work well—use 3-4 chiles instead of ancho for similar depth. For extra smokiness, add ½ tsp chipotle powder. Avoid very hot chiles like habanero unless you want intense heat.
Why does my sauce taste bitter?
Bitter flavor usually means over-charred vegetables or burnt spices. Keep tomatoes and onions at 50% char—remove them when just blackened in spots. Toast spices over medium heat for 30 seconds max and stir constantly. A splash of lime juice at the end can also brighten flavors.
How do I make this sauce spicier?
Add ½ tsp cayenne pepper or 1 tsp smoked paprika during the simmering step. For heat without dryness, blend in 1-2 roasted jalapeños (seeds removed) with the tomatoes. Always taste as you go—adjust gradually to avoid overwhelming the sauce.
Can I use this sauce for dishes other than enchiladas?
This versatile sauce works perfectly for tacos, quesadillas, or as a dip for grilled meats. For nachos, add ½ cup crumbled cotija cheese and ¼ cup chopped cilantro after heating. The celery crown also makes a great topping for loaded baked potatoes or grilled corn.
How do I fix a sauce that's too thick?
Thin with 1 tbsp broth or water at a time, stirring well between additions. For a smoother texture, blend briefly in a food processor. If the sauce separates, whisk vigorously or simmer gently for 2-3 minutes to re-emulsify. The sauce will naturally thicken more as it cools, so don't over-reduce it initially.