Sauces & Condiments
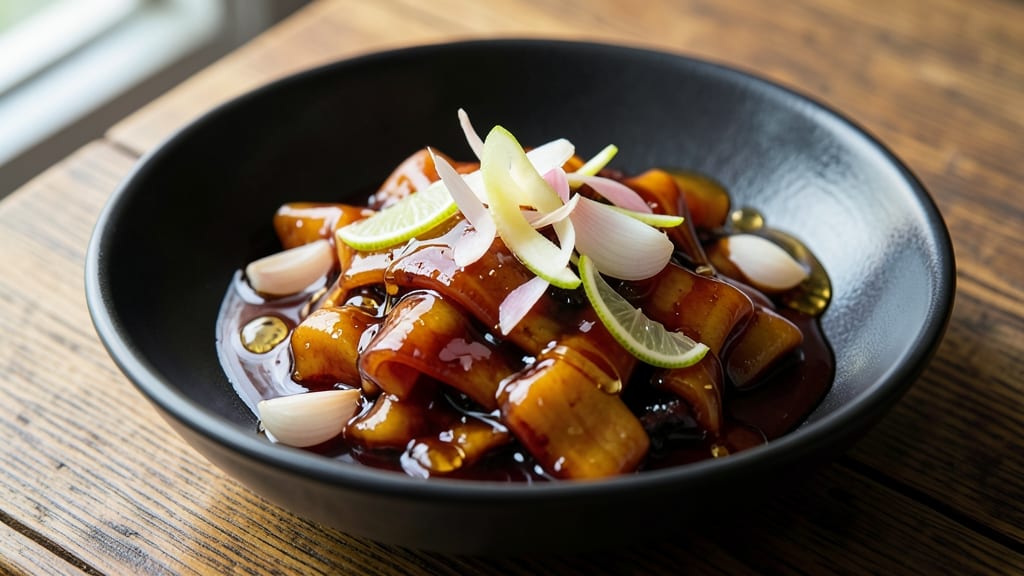
This Asian rib sauce recipe transforms ordinary ribs into a showstopper with its velvet-smooth heat and hidden vinegar zing—the perfect balance of sweet, tangy, and umami that clings to every bite. 🌟 The secret lies in simmering soy sauce, hoisin, honey, and rice vinegar until thickened into a glossy, sticky glaze that caramelizes beautifully on the grill or in the oven.
The sauce’s magic comes from its layered flavors: the deep savoriness of soy and hoisin, the bright acidity of vinegar, and the subtle sweetness of honey, all harmonized with a touch of garlic and ginger.
Unlike store-bought versions, this recipe builds complexity by reducing the sauce slowly, allowing the ingredients to meld into a cohesive, restaurant-worthy glaze.
What makes this sauce truly versatile is its dual purpose—use it as a glazing sauce for ribs, a dipping sauce for extra moisture, or even a basting sauce to keep the meat tender.
The texture is thick enough to cling but smooth enough to coat every bite, ensuring every forkful delivers that perfect balance of heat and tang.
Once you taste the difference, you’ll never go back to bottled sauces. Ready in just 20 minutes, this recipe is a game-changer for weeknight dinners or weekend BBQs. Let’s get started!
Ingredients for asian rib sauce
Nine ingredients transform into a restaurant-quality Asian rib sauce with velvet-smooth heat and bright vinegar zing.
| Ingredient | Amount | Notes |
|---|---|---|
| Soy Sauce 🍶 | ½ cup | High-quality, low-sodium preferred |
| Hoisin Sauce 🍶 | ¼ cup | Authentic Chinese hoisin for depth |
| Rice Vinegar 🍶 | ¼ cup | White or seasoned, for tanginess |
| Honey 🍯 | ¼ cup | Wildflower preferred for balance |
| Garlic Cloves 🧄 | 4 cloves | Minced for aromatic base |
| Fresh Ginger 🌿 | 1 tbsp | Grated, for zesty warmth |
| Red Chili Flakes 🌶️ | 1 tbsp | Adjust for heat preference |
| Sesame Oil 🫒 | 1 tbsp | Toasted for nutty aroma |
| Cornstarch 🌾 | 1 tbsp | For thickening consistency |
| Water 💧 | ¼ cup | Room temperature, for slurry |
The foundation of this sauce lies in the quality of your base ingredients. Kikkoman soy sauce or Lee Kum Kee hoisin are ideal for authentic depth, though any reputable brand works. For vinegar, Mushroom or Seasoned Rice Vinegar from Annie Chun's adds subtle umami. Honey should be wildflower or clover—avoid overly processed varieties that lack complexity. Fresh ginger and garlic are non-negotiable; pre-minced jarred versions lack the aromatic punch. If you're short on time, frozen ginger works in a pinch, but freshly grated delivers superior flavor. The red chili flakes should be crisp and vibrant—no stale, dull-tasting remnants from the back of your pantry.
Substitutions are possible, but each swap alters the sauce's balance. Tamari can replace soy sauce for gluten-free adaptation, though the flavor profile shifts slightly. Apple cider vinegar works if rice vinegar is unavailable, but the sauce will taste less nuanced. For honey, maple syrup or agave nectar maintain sweetness, though the flavor profile differs. If you lack sesame oil, toasted sesame seeds sprinkled at the end add texture and aroma. The cornstarch slurry is crucial for achieving that perfect glossy consistency—don't skip it, even if the sauce seems thick enough. For a smokier profile, add 1/2 teaspoon smoked paprika during the final reduction. The sauce's versatility means it works beautifully as a glaze, dipping sauce, or basting liquid for ribs, chicken, or tofu.
This sauce reaches peak flavor after simmering, so resist the urge to rush. Store any leftovers in an airtight container in the fridge for up to 1 week, though it's best used within 3-4 days for optimal texture. For longer storage, freeze in ice cube trays—perfect for single-use portions. The sauce thickens as it cools, so reheat gently with a splash of water if it becomes too stiff. When using as a glaze, apply liberally to ribs during the last 10 minutes of cooking to prevent burning. For extra shine, brush with a thin layer of neutral oil after glazing. The sauce's complexity develops over time, making it even more delicious the next day.
Why You'll Love This Recipe
- Pantry Magic: I’ll bet you already have every single thing in your fridge. Soy sauce, hoisin, rice vinegar—those are my go-to staples. No specialty shopping, no last-minute grocery runs. Just measure, mix, and go.
- Sweet-Savory Balance: That honey and garlic combo? It’s the secret weapon. The soy and hoisin give it depth, but the vinegar cuts through the richness—like a perfect harmony. One taste and you’ll be dipping ribs and fries in it.
- Weeknight Hero: I make a double batch every Sunday because it’s my meal prep BFF. Toss it on ribs, chicken, or even noodles—it never lets me down. (Yes, even when I forget to thaw the meat.)
- Budget-Friendly Luxury: Hoisin and soy sauce stretch like crazy, so this sauce costs pennies but tastes like a fancy takeout menu. Plus, leftovers? They keep for weeks in the fridge—no waste, all flavor. My wallet thanks me.
Step-by-step instructions for Asian rib sauce
Here's how to craft a perfectly balanced sauce with layers of umami, sweetness, and subtle heat.
🍳 Step 1: Bloom the Aromatics in Sesame Oil
Heat a small saucepan over medium-low heat and add the 1 tablespoon sesame oil. Once it shimmers gently, add the 4 cloves minced garlic cloves and 1 tablespoon grated fresh ginger. Cook for 1-2 minutes until fragrant but not browned—this prevents bitterness and builds the aromatic foundation.
I like to watch for the moment when the garlic just loses its raw scent but hasn't turned golden. This is your signal to move quickly to the next step before the oil starts to smoke. The sesame oil carries these aromatics beautifully, creating that nutty depth that makes this sauce special.
🍳 Step 2: Combine Wet Ingredients and Simmer
Pour in the 0.5 cup soy sauce, 0.25 cup hoisin sauce, 0.25 cup rice vinegar, and 0.25 cup honey all at once. Stir vigorously to incorporate, then increase heat to medium-high until the mixture reaches a gentle boil. Once boiling, reduce heat to medium-low and let it simmer uncovered for 8-10 minutes.
This simmering time is crucial—it allows the flavors to meld while the vinegar's acidity begins to brighten the sauce. You'll see the mixture reduce slightly and develop a glossy sheen. Here's the thing—don't walk away. Stir occasionally to prevent scorching at the bottom of the pan, which would add unwanted bitterness.
🔥 Step 3: Build the Thickening Slurry
In a small bowl, whisk together the 1 tablespoon cornstarch and 0.25 cup room temperature water until completely smooth. This creates your thickening slurry. Once your sauce has simmered for 5 minutes, carefully pour the slurry into the saucepan while stirring continuously with a wooden spoon.
Watch closely as the sauce begins to thicken—it should reach a velvety consistency similar to heavy cream within 2-3 minutes of adding the slurry. If it thickens too quickly, add 1 tablespoon water at a time to adjust. The goal is a sauce that coats the back of a spoon but still flows smoothly. This is where precision matters most.
🌶️ Step 4: Incorporate Chili Flakes and Final Adjustments
Remove the sauce from heat and stir in the 1 tablespoon red chili flakes. Let it steep for 2 minutes to infuse the heat throughout. Taste and adjust seasoning—you might need to add a pinch more soy sauce for saltiness or a touch of honey for sweetness. The sauce should balance all five flavors: sweet, salty, sour, umami, and heat.
Here's where it gets interesting: the vinegar's acidity should cut through the richness of the hoisin and honey, while the chili adds just enough heat to make your ribs sing. If you prefer more heat, add another ½ teaspoon chili flakes and let it steep another minute. For a smoother texture, strain through a fine-mesh sieve to remove any chili particles.
⏰ Step 5: Rest and Perfect the Texture
Transfer the sauce to a heatproof bowl and let it rest at room temperature for 15-20 minutes. This resting period allows the flavors to fully harmonize and the sauce to reach its ideal consistency. The sauce should be thick enough to cling beautifully to ribs but still flow when poured.
I always give the sauce this resting time before using it—it makes a noticeable difference in the final result. The flavors develop depth, and the texture becomes perfectly balanced. For best results, use the sauce immediately on freshly cooked ribs, but it will keep in an airtight container in the refrigerator for up to 5 days.
Pro Tips For Making Asian Rib Sauce
- Mince Garlic Like You Mean It: I learned this the hard way—slicing garlic cloves and letting them sit in the sauce makes it taste like you used a garlic press. Instead, finely mince them with a knife (or pulse in a food processor for 2 seconds) so they dissolve completely into the sauce. The texture should be nearly invisible—no chunks, just flavor.
- Simmer Low and Slow: After burning three batches of sauce by boiling it too fast, I finally realized: this isn’t a race. Keep the heat at a gentle simmer (small bubbles, occasional stir) for 8–10 minutes. Rushing turns the honey into a caramelized mess, while slow cooking lets the flavors meld without scorching.
- Balance Vinegar Last: Taste the sauce before adding rice vinegar—it’s the easiest way to ruin a perfectly balanced batch. Add it in small drizzles (start with ½ teaspoon) after the soy and hoisin have simmered. Too much upfront makes the sauce taste sharp and unfinished.
- Use Dark Soy for Depth: Swap half the regular soy sauce for dark soy sauce—it’s the upgrade no one talks about. The molasses notes cut through the sweetness of the honey and add a rich, almost smoky complexity. (Yes, even if you’re impatient like me, this step is worth it.)
Best sauces and condiments for these flavors
Sweet Heat Balance
This sauce achieves its signature harmony by balancing honey's sweetness with rice vinegar's tang and chili flakes' heat. The key is simmering all ingredients together for 8-10 minutes—this lets the vinegar's acidity brighten the sweetness while the chili infuses evenly.
I find the 1:1 ratio of honey to vinegar creates perfect equilibrium, but adjust to taste. 🌶️
Umami Depth Secrets
The sauce's rich umami comes from soy sauce and hoisin, but the real magic happens when you bloom garlic and ginger in sesame oil first. This step releases their aromatic compounds, creating a deeper flavor base.
For extra umami, add 1 teaspoon fish sauce or ½ teaspoon MSG during simmering. Trust me, it elevates everything.
Texture Control Tips
The cornstarch slurry is non-negotiable for that perfect glossy, clinging texture. Mix it thoroughly with water to avoid lumps, then stir constantly while adding to the sauce.
If it thickens too fast, add 1 tablespoon water at a time. For a smoother finish, strain through a fine-mesh sieve after cooking to remove any chili particles.
Versatile Uses Beyond Ribs
While perfect for ribs, this sauce shines on grilled chicken, pork chops, or even tofu. Use it as a glaze, dipping sauce, or marinade—just reduce cooking time by half if using as a marinade.
For extra shine, brush ribs with a thin layer of neutral oil before applying the sauce. The sauce's versatility makes it a pantry staple.
Storage Hacks
Store leftovers in an airtight container in the fridge for up to 5 days. For longer storage, freeze in ice cube trays—perfect for single-use portions.
The sauce thickens as it cools, so reheat gently with a splash of water if needed. I always make extra because it disappears fast! ❄️
Flavor Boost Variations
Craving more depth? Add 1 teaspoon toasted sesame seeds or ½ teaspoon five-spice powder for complexity. For smokiness, include ½ teaspoon smoked paprika during simmering. Each variation keeps the sauce's core balance while adding exciting new dimensions. Experiment fearlessly!
Nutrition facts
Frequently asked questions
Can I make this sauce without cornstarch?
Yes, but the texture will be thinner. For a cornstarch-free version, replace it with 1 tablespoon arrowroot powder or 1 teaspoon xanthan gum mixed with 0.25 cup water. Simmer the sauce longer (up to 15 minutes) to achieve similar thickness. Alternatively, reduce the liquid ingredients slightly if you prefer a natural, unthickened sauce.
How do I adjust the heat level?
The recipe includes 1 tablespoon chili flakes for mild heat, but you can easily customize it. For a milder sauce, reduce to ½ teaspoon chili flakes or swap for ½ teaspoon ground white pepper. For extra heat, add 1 teaspoon gochujang or ½ teaspoon cayenne pepper during the final simmer. Taste as you go—heat builds gradually!
Can I use this sauce on non-rib proteins?
This versatile sauce works beautifully on grilled chicken, pork chops, shrimp, or even tofu. For best results, reduce cooking time by half if using as a marinade (apply for 30-60 minutes before cooking). As a glaze, brush on during the last 10 minutes of cooking for maximum flavor and shine.
Why did my sauce turn out too thin?
This usually happens if the sauce wasn't simmered long enough or if the cornstarch slurry wasn't added properly. For a quick fix, mix 1 teaspoon cornstarch with 1 tablespoon water, stir into the sauce, and simmer for 2-3 minutes until thickened. To prevent this next time, ensure you simmer uncovered for the full 8-10 minutes and whisk continuously when adding the slurry.
Can I make this sauce ahead of time?
Yes! This sauce actually tastes better after resting. Prepare it up to 3 days in advance and store in an airtight container in the fridge. The flavors meld beautifully over time. For longer storage, freeze in ice cube trays**—perfect for single-use portions. Thaw overnight in the fridge before using, and reheat gently with a splash of water if needed.