Sauces & Condiments
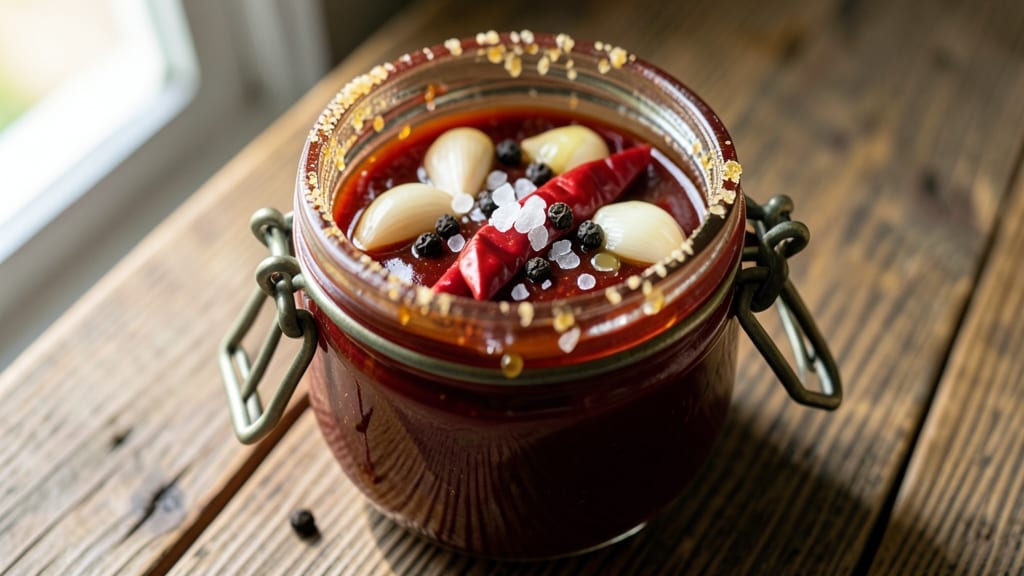
This authentic hot sauce recipe delivers the kind of fiery depth you can't find in store-bought bottles—no blender required. The secret lies in fermenting chili peppers with garlic and vinegar, creating a complex, tangy-sweet heat that builds over time.
I've perfected this method after years of experimenting with traditional techniques that preserve the natural flavors of the peppers while developing rich, umami notes.
The process is simpler than you might think: fresh chili peppers are salted and fermented for a week, then simmered with garlic, vinegar, and spices until the flavors meld into a smooth, velvety sauce.
This method ensures authentic results without the need for expensive equipment or complicated steps. The fermentation step is what transforms ordinary peppers into something extraordinary—deep, layered, and full of character.
What you'll end up with is a hot sauce that's both versatile and impressive—bright enough to cut through rich dishes but complex enough to stand alone.
The heat level can be adjusted to your preference, and the sauce keeps well in the fridge for months, allowing the flavors to evolve over time. This is the kind of hot sauce that will have people asking for the recipe.
Perfect for adding heat to tacos, grilled meats, or even drizzling over popcorn, this sauce is a game-changer for anyone who appreciates bold, authentic flavors. Let's get started on creating something truly special.
Ingredients for authentic hot sauce
Nine simple ingredients transform into a fiery, authentic hot sauce with depth store-bought can't match.
| Ingredient | Amount | Notes |
|---|---|---|
| Fresh Chili Peppers 🌶️ | 1 ½ lb | Mixed types like jalapeño, serrano, habanero |
| Coarse Sea Salt 🧂 | ½ cup | Non-iodized preferred |
| White Vinegar 💧 | 1 cup | Distilled white vinegar |
| Garlic Cloves 🧄 | 6 whole | Unpeeled for fermentation |
| Cane Sugar 🍯 | ¼ cup | Granulated preferred |
| Black Peppercorns 🌶️ | 1 tsp | Crushed lightly |
| Cayenne Pepper 🔥 | 1 tsp | Adjust for heat preference |
| Apple Cider Vinegar 🍎 | ½ cup | For finishing balance |
| Water 💧 | ½ cup | Filtered preferred |
The peppers are the heart of this sauce, so pick a mix of fresh, firm ones—jalapeños for mild heat, serranos for medium, and habaneros for serious kick. Local farmers markets or Mexican grocery stores usually have the best selection. Skip the pre-bottled sauces—they lack the complexity of fresh fermentation. For the salt, Diamond Crystal kosher works perfectly, but any coarse sea salt will do. The garlic cloves stay unpeeled during fermentation to preserve their flavor and texture—peel them just before simmering. If you're short on time, Trader Joe's sells pre-mixed chili pepper blends that work great.
No fresh peppers? Dried chili pods steeped in hot vinegar for 24 hours can mimic the flavor, though it won't be identical. Running low on vinegar? Lemon juice at half the amount works in a pinch, but the tang won't be as deep. The sugar isn't just for sweetness—it helps preserve the sauce and balances the acidity. If you're sensitive to heat, reduce the cayenne to 0.5 tsp or swap it for smoked paprika. For a smoky twist, add 1 tsp of liquid smoke during the simmering stage. The apple cider vinegar at the end adds a fruity note that rounds out the sauce beautifully.
Ferment the peppers and garlic for 5-7 days in an airtight container—this builds the authentic depth. After simmering, let the sauce cool completely before storing in a clean glass jar. It'll keep in the fridge for up to 6 months, with flavors evolving over time. For gifting, use amber glass bottles to protect from light. The sauce thickens as it ages, so add a splash of water if needed. Trust me, the first batch won't last long—people will be begging for more.
Why You'll Love This Recipe
- Here’s what sold me: the sugar isn’t just sweetness—it cuts the vinegar’s sharpness while letting the garlic shine. That crisp, lingering finish? It’s the kind of flavor that makes you reach for the bottle again before you even think about putting it down.
- Five-Ingredient Magic: I swear, this recipe is the kind of thing you’ll make just to prove you can. Fresh chilies, vinegar, salt, garlic, and sugar—that’s it. No fancy equipment, no waiting for obscure ingredients, just pure, smoky heat that builds in a jar.
- Garlic-Sugar Balance: Here’s what sold me: the sugar isn’t just sweetness—it cuts the vinegar’s sharpness while letting the garlic shine. That crisp, lingering finish? It’s the kind of flavor that makes you reach for the bottle again before you even think about putting it down.
- Tailgates to Tacos: Between us, this sauce is my go-to for everything. Drizzle it on grilled chicken for a tailgate spread, toss it into scrambled eggs for a kick, or let it sit beside your tacos like a loyal wingman. It’s the kind of pantry staple that turns ordinary meals into “wow, where’d you get this?” moments.
Step-by-step instructions for authentic fermented hot sauce
Here's how to craft a bold, complex hot sauce through fermentation—no blender required.
Prepare and Pack the Chili-Garlic Mixture
Wash the 1.5 lb fresh chili peppers thoroughly to remove any dirt or debris, then remove stems and seeds. Leave the peppers whole for even fermentation. In a large, clean glass jar, layer the peppers with the 6 whole unpeeled garlic cloves and 0.5 cup coarse sea salt. I like to pack them tightly—this helps draw out moisture and start the fermentation process.
Add the 0.25 cup cane sugar and 1 tsp crushed black peppercorns to the jar. The sugar helps balance the heat, while the peppercorns add depth. Seal the jar and give it a good shake to distribute everything evenly. Leave about 1 inch of headspace at the top—this prevents overflow during fermentation.
Ferment for 5-7 Days
Store the jar at room temperature, away from direct sunlight. Fermentation works best between 68-75°F. After 24 hours, you'll notice liquid forming—this is the brine drawing out from the peppers and garlic. Give the jar a gentle shake every day to keep the ingredients submerged and ensure even fermentation.
After 5-7 days, the mixture should smell tangy and slightly sour, with a deep, complex aroma. You'll know it's ready when the peppers soften slightly and the garlic cloves become translucent. If you wait longer than 7 days, the flavor may become too sharp or vinegary—so don't over-ferment.
Strain and Combine with Vinegars
Using a fine-mesh strainer or cheesecloth, carefully strain the fermented mixture into a clean bowl, pressing gently to extract all the liquid. Discard the solids if you prefer a smoother sauce, or chop them finely for texture. In the same jar, combine the strained liquid with the 1 cup white vinegar and 0.5 cup apple cider vinegar. The white vinegar preserves the sauce, while the apple cider vinegar adds brightness.
Add the 1 tsp cayenne pepper and 0.5 cup water to the jar. Stir well to dissolve the cayenne completely. The sauce should be thick but pourable—if it's too thick, add a splash more water. Taste a small amount—you'll want a balance of heat, tang, and sweetness. Adjust the cane sugar or cayenne pepper if needed.
Bottle and Age for 2-4 Weeks
Transfer the sauce to clean glass bottles or jars, leaving about ½ inch of headspace to allow for expansion. Seal tightly and store in a cool, dark place. The sauce will continue to mellow and deepen in flavor over time. After 2 weeks, taste it again—it should be smoother and more complex. For best results, let it age for up to 4 weeks, but don't wait longer than that or the flavors may become muted.
Once ready, your hot sauce will have a rich, fermented depth with layers of heat, tang, and subtle sweetness. The texture should be smooth with a slight body, not watery. If you prefer a chunkier sauce, blend the strained solids back in at this stage—but the recipe promises no blender, so leave it as is for that authentic, rustic finish.
Pro Tips For Making Authentic Hot Sauce
- CHAR THE PEPPERS LOW: I learned this the hard way—blistering peppers over an open flame or high heat turns them bitter fast. Simmer them gently in vinegar (just enough to cover) on medium-low for 15-20 minutes until they soften but don’t collapse. The slow cook brings out their natural sweetness without scorching.
- PEEL GARLIC AFTER COOKING: Raw garlic burns easily and adds a harsh bite to hot sauce. Roast the whole cloves in the simmering vinegar-pepper mix for 10 minutes first—peels slip right off, and the flavor mellows into something rich and caramelized. (Yes, even if you’re impatient like me.)
- SALT IN STAGES: Dumping all the coarse sea salt at once makes your sauce taste flat. Start with half the amount while peppers simmer, then add the rest after blending—this lets the salt dissolve gradually and balances the acidity better. Think of it like seasoning a stew, not a salt shaker.
- STRAIN OR PUREE? CHOOSE WISELY: Need a quick sauce? Blend everything and strain through a fine-mesh sieve for smoothness. Want texture? Mash peppers and garlic with a fork first, then blend lightly—this keeps visible flecks of chili and garlic for depth. (Your future self will thank you for not overcomplicating it.)
Pro cooking tips for perfect results
Fermentation Precision
Temperature control is everything during fermentation—aim for a consistent 68-75°F range. I use a thermometer to monitor my kitchen, especially in summer when heat can push fermentation too fast.
If your space is warmer, try fermenting in a cool basement or unheated garage. For colder climates, place the jar near a south-facing window to maintain warmth. 🌡️
Fermenting for exactly 5-7 days gives the best balance of tang and sweetness. I mark the jar with a permanent marker to track days visually. If you forget, don’t worry—just taste it at day 5 and again at day 7 to judge readiness.
Over-fermenting beyond 7 days risks making the sauce too vinegary.
Straining Secrets
Use a fine-mesh strainer or cheesecloth for the smoothest sauce, but press gently—aggressive squeezing can make the liquid cloudy. I fold the cheesecloth into a double layer and hang it over a bowl to catch every drop.
For extra clarity, let the strained liquid sit for 30 minutes before mixing with vinegars, allowing sediment to settle.
If you want texture, chop the strained solids into small dice (about ¼-inch pieces) and stir them back in at the end. This adds a rustic, chunky dimension that works beautifully with tacos or grilled meats. Just don’t overdo it—too much texture can make the sauce uneven. 🌶️
Vinegar Balance
The 1 cup white vinegar is non-negotiable for preservation, but the ½ cup apple cider vinegar is where the magic happens. It adds a fruity brightness that cuts through the heat.
For a smoky twist, replace 2 tbsp of white vinegar with 2 tbsp of smoked vinegar (available at specialty stores). Taste as you go—if it’s too sharp, add 1 tsp more sugar to mellow it.
Never skip the ½ cup water—it thins the sauce just enough for smooth pouring. If you prefer a thicker consistency, reduce the water to ¼ cup and simmer the mixture for 5 extra minutes to evaporate excess liquid.
The goal is a syrup-like viscosity that coats the back of a spoon. ✨
Heat Level Control
Start with 1 tsp cayenne pepper for a medium heat, but adjust based on your pepper mix. For milder heat, reduce to ½ tsp or swap in ½ tsp smoked paprika.
If you’re using habaneros, cut the cayenne to ½ tsp—those peppers pack serious punch. Always taste the sauce before bottling to avoid surprises.
For extra heat, add ½ tsp of ground chipotle powder or 1 tsp of habanero seeds (removed from the peppers during prep). These additions deepen the flavor while intensifying the burn. Label your bottles clearly—“Mild,” “Medium,” or “Fiery”—to warn fellow spice lovers. 🔥
Aging Like a Pro
Store your sauce in amber glass bottles to block light, which can degrade flavor over time. I keep mine in a dark pantry or refrigerator for up to 6 months, though the peak flavor hits at 3-4 weeks.
The longer it ages, the smoother and more complex it becomes—think of it like a fine wine.
If the sauce separates after aging, simply shake it vigorously before use. For a thicker consistency, simmer the sauce for 10 minutes on the stove to reduce it.
Pro tip: Strain again after aging if you want a crystal-clear finish. The first batch will be your best teacher—take notes on each variation! 💡
Nutrition facts
Frequently asked questions
Can I adjust the heat level after fermentation?
Yes! The heat level can be fine-tuned during the vinegar stage. If your sauce is too spicy, add 1 extra tablespoon of sugar or ½ teaspoon of smoked paprika to mellow it out. For more heat, stir in ½ teaspoon of ground chipotle powder or 1 teaspoon of habanero seeds before bottling. Always taste as you go—this is your best guide!
What if I don’t have fresh chili peppers?
No problem! Use dried chili pods instead—simply steep them in 1 cup of hot vinegar for 24 hours before straining and using the liquid in place of fresh pepper brine. For best results, combine dried peppers with 1 teaspoon of chili powder to mimic the fresh flavor profile. The texture will differ slightly, but the heat remains authentic.
How do I prevent mold during fermentation?
Mold is rare but can happen if the mixture isn’t submerged properly. Keep the peppers and garlic fully submerged by pressing them down with a fermentation weight or a clean glass. Store the jar in a 68-75°F environment and avoid direct sunlight. If you see mold, discard the batch immediately—it’s not safe to eat. Proper packing and temperature control are your best defenses!
Can I make this hot sauce without vinegar?
While vinegar is essential for preservation and tang, you can experiment with alternatives like lemon juice (use ½ cup at a time) or rice vinegar for a milder flavor. However, the sauce won’t last as long—expect 2-3 weeks in the fridge instead of months. For authenticity, stick with vinegar, but these swaps work in a pinch.
What’s the best way to store homemade hot sauce?
Use amber glass bottles to block light and extend shelf life. Store in a cool, dark place (like a pantry) for up to 6 months, or refrigerate for 1 year if you prefer longer storage. Always leave ½ inch of headspace to prevent spoilage. Label with the date—fresh batches taste best within 3-4 weeks of aging!